
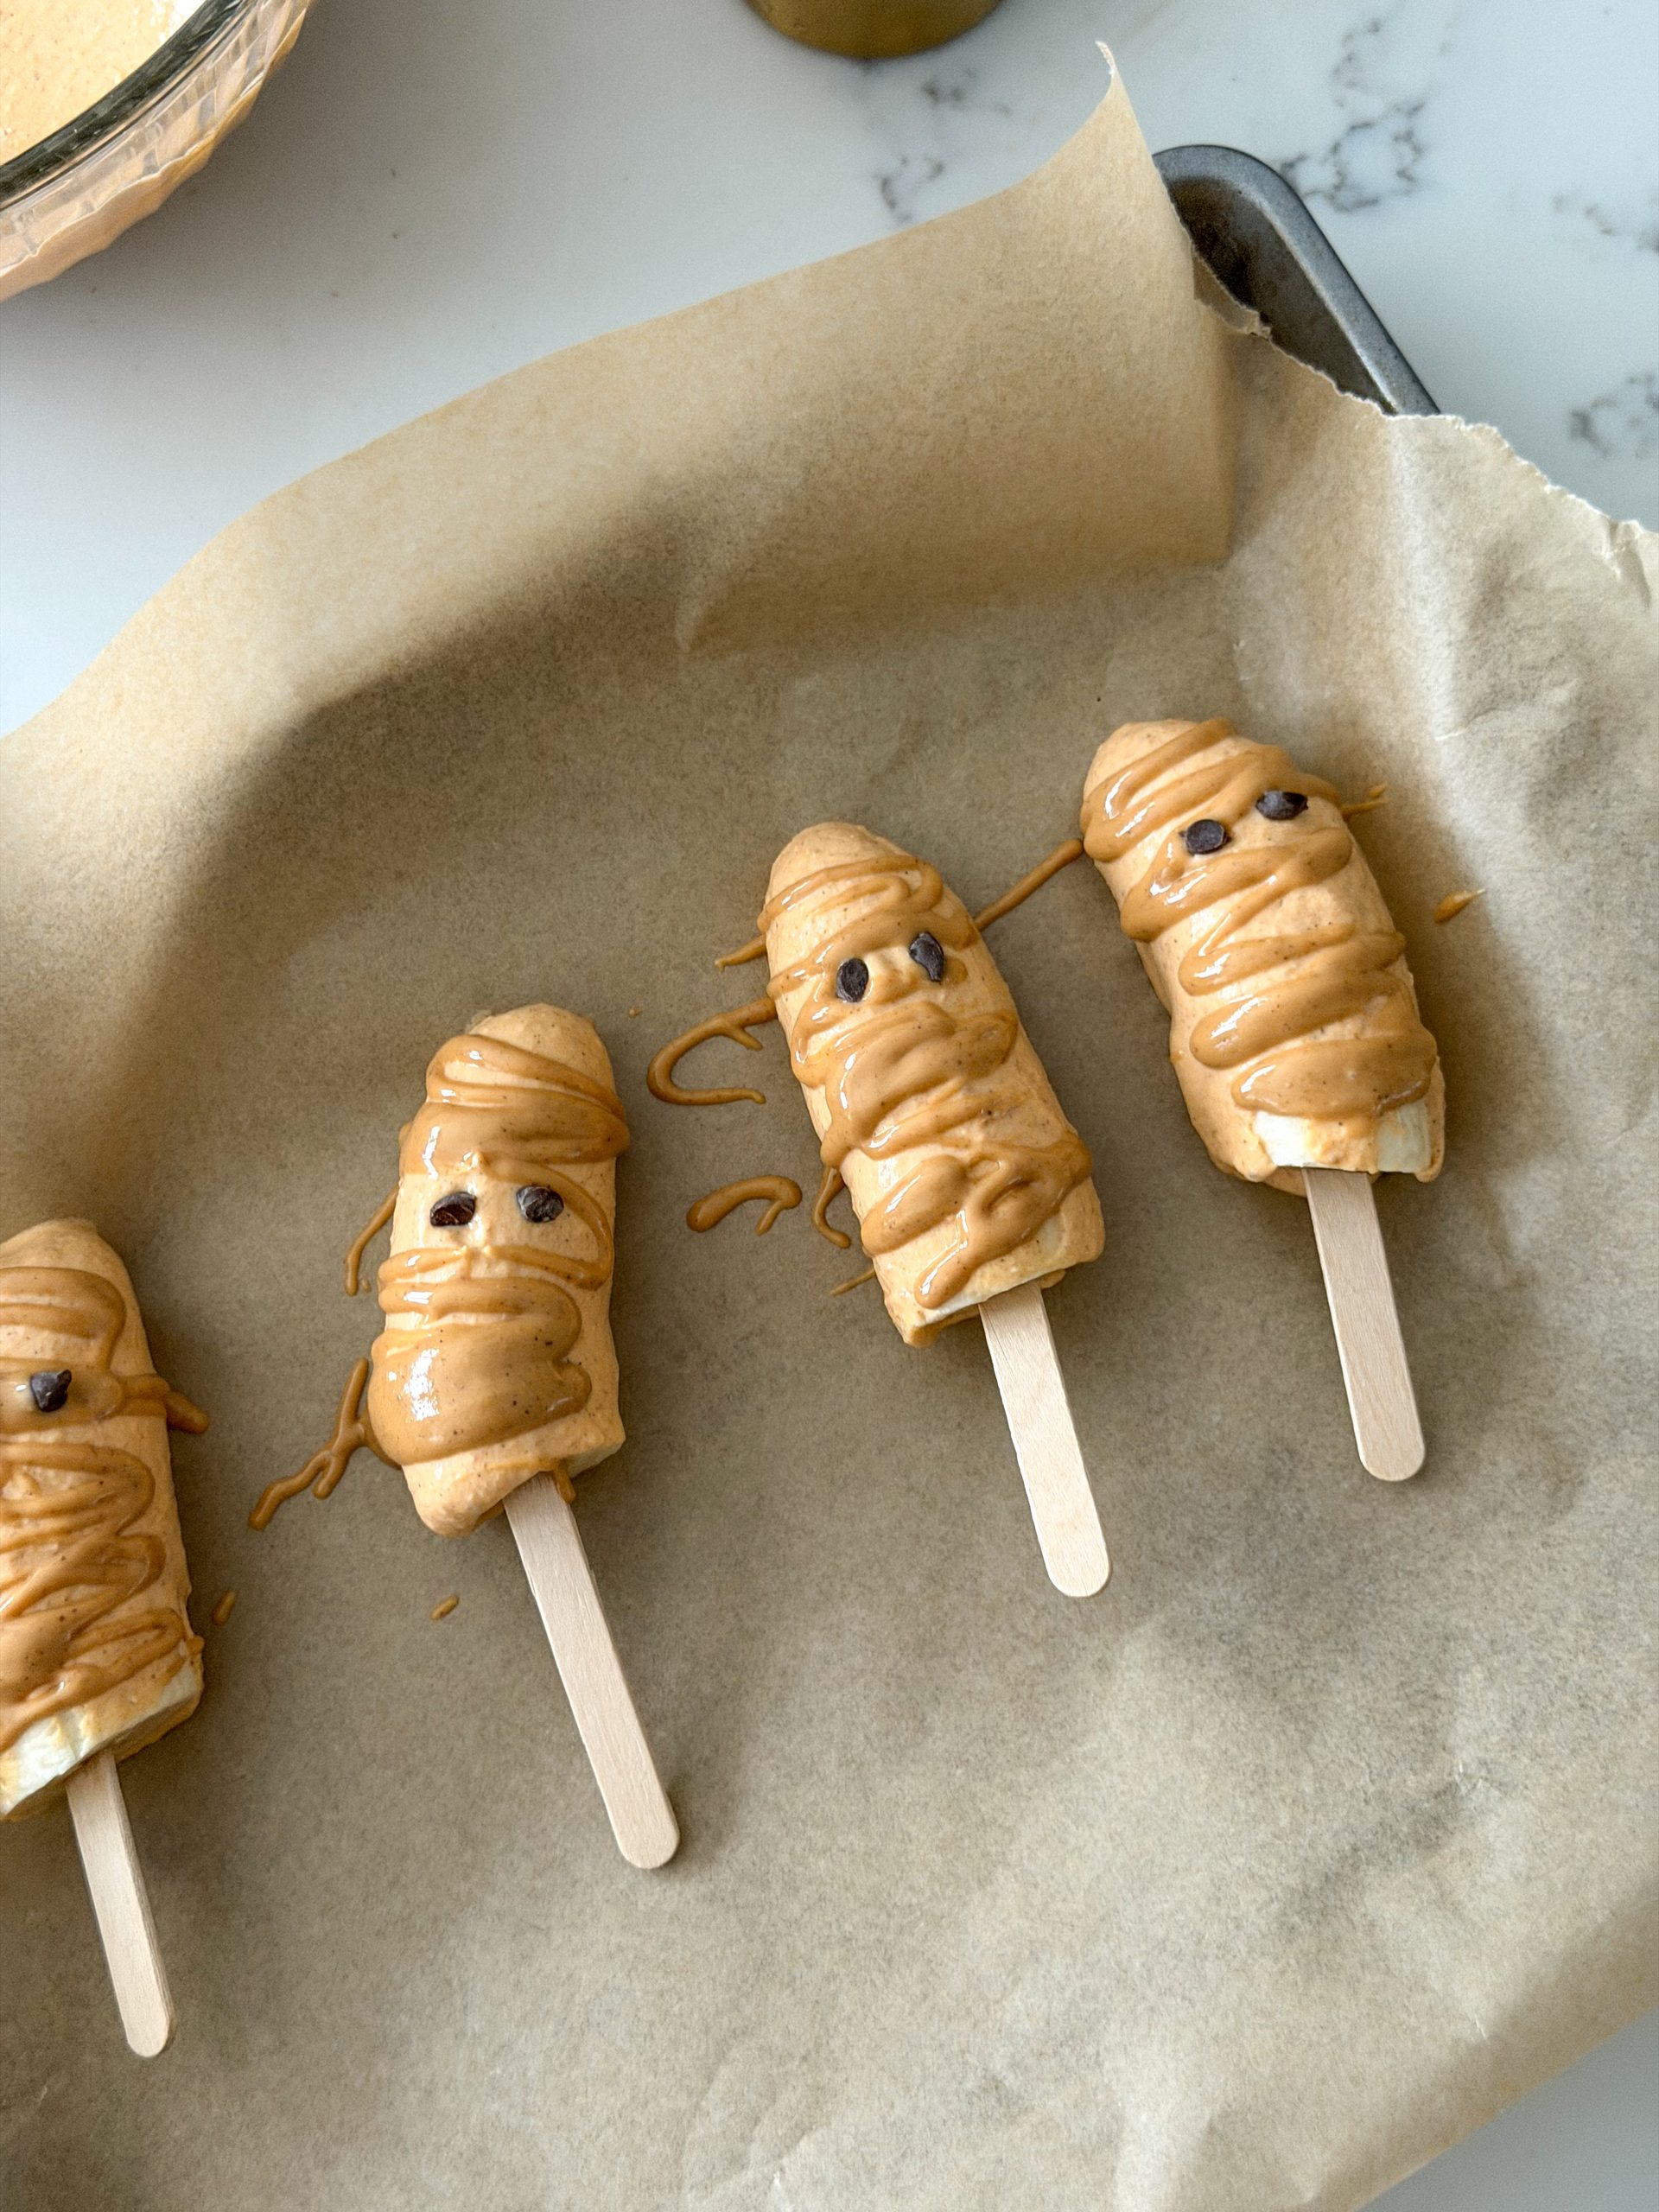
These Halloween banana pops are such a fun and easy fall snack for kids! Bananas are dipped in a creamy pumpkin yogurt mixture, drizzled with peanut butter to make little "mummy" wraps, and finished with mini chocolate chip eyes.
They're festive enough for Halloween but made with simple ingredients you probably already have at home. Plus, there's no baking involved!
As a toddler dietitian and busy mom, I LOVE finding ways to make everyday foods a little more fun around the holidays. We don't have to make every snack Pinterest-perfect, but sometimes changing the shape, presentation, or theme of a familiar food is all it takes to make snack time feel extra exciting.
Why You'll Love These Halloween Banana Pops
These little banana yogurt popsicle mummies are:
- super easy to make
- no-bake
- made with simple ingredients
- naturally sweet from banana
- easy to make with no added sugar
- a fun way to use leftover pumpkin purée
- perfect for a Halloween snack or party
- a fun recipe to let the kids help make!
And despite how cute they look, you definitely don't need to be crafty to make them. If you want more of a traditional vibe, then check out my "basic" banana yogurt popsicle recipe!
Jump to:
- Why You'll Love These Halloween Banana Pops
- Ingredients You'll Need
- How to Make Your Halloween Banana Pops
- Tips for the Best Banana Yogurt Pops
- Substitutions
- Other Ways to Decorate Your Halloween Banana Pops
- Why Add Pumpkin?
- Equipment
- How to Store Halloween Banana Pops
- Dietitian Tiff's Tip
- FAQ
- Related
- Pairing
- Healthy Halloween Banana Pops
Ingredients You'll Need
Here's what you'll need to make these super easy Halloween banana pops:
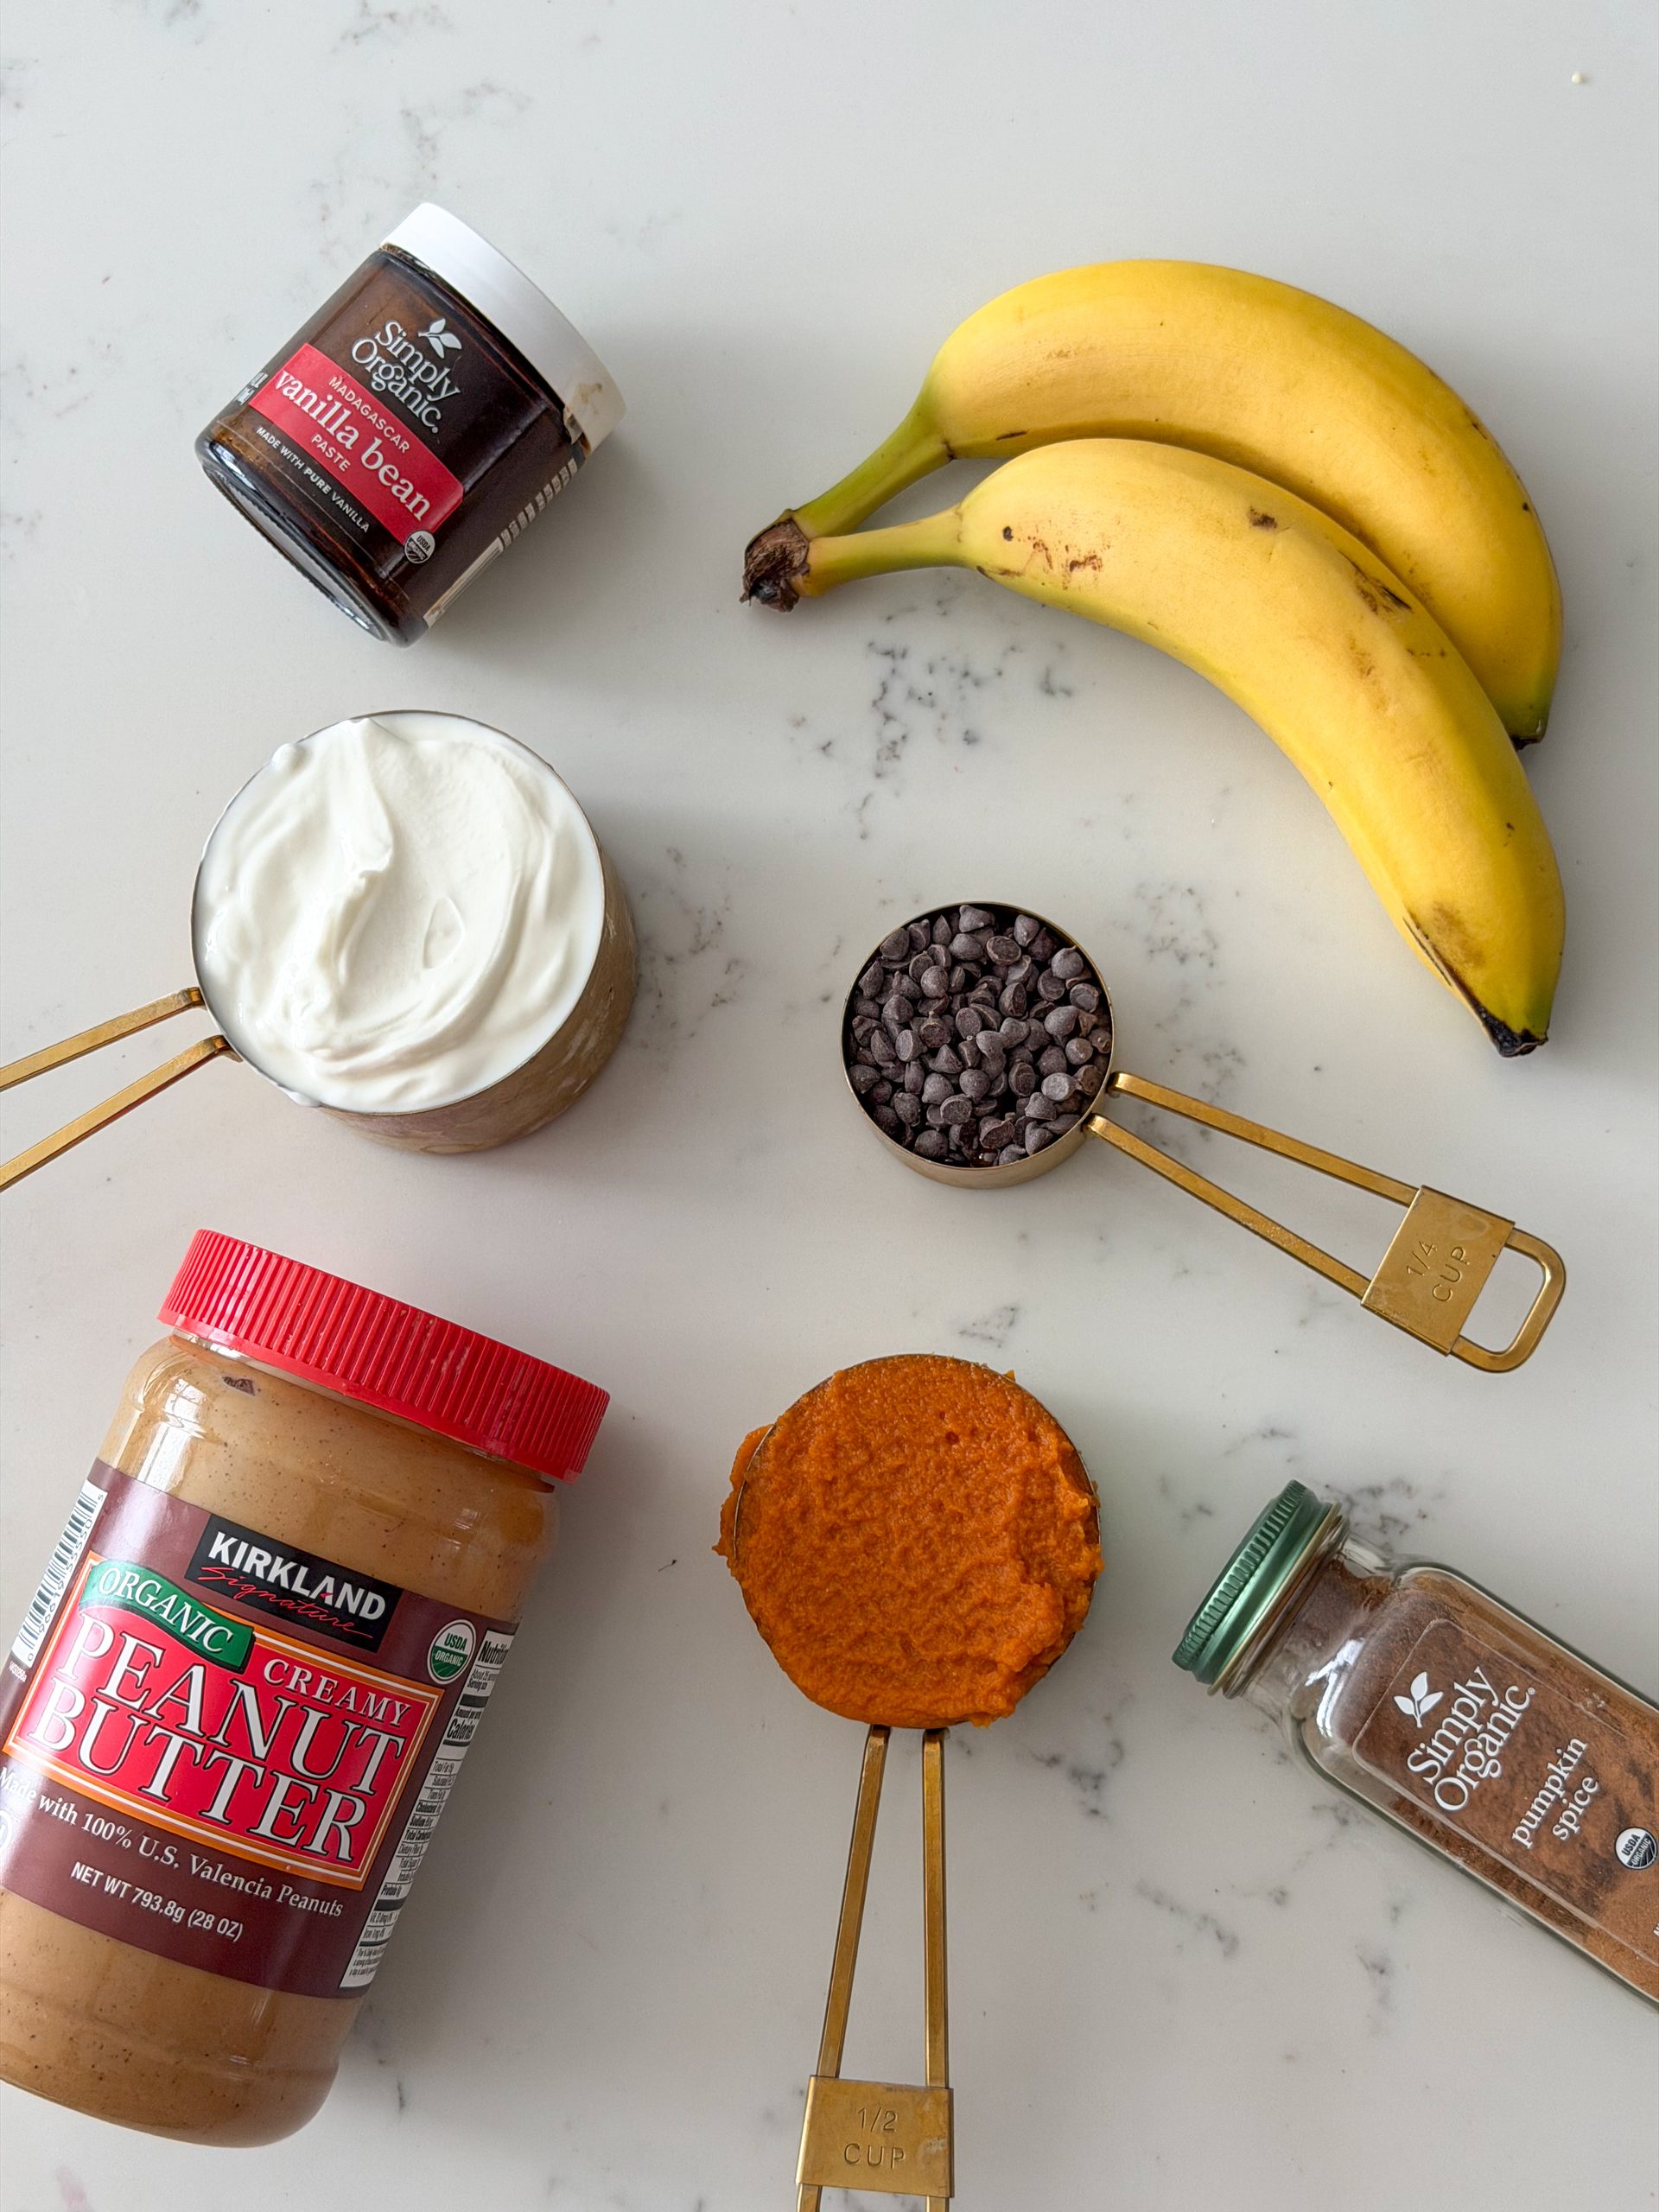
- Bananas: Choose bananas that are ripe but still fairly firm. Very ripe bananas can become too soft once dipped.
- Greek yogurt: A thick plain Greek yogurt works especially well because it sticks to the bananas better than a thinner yogurt. Dairy-free yogurt works too!
- Pumpkin purée: Make sure you're using 100% pumpkin purée rather than pumpkin pie filling.
- Vanilla: Adds a little extra sweetness and flavor to the pumpkin yogurt coating.
- Pumpkin pie spice or cinnamon: Either works! Pumpkin pie spice gives them more of that classic fall flavor.
- Maple syrup: Totally optional. Add a small amount if you want the yogurt coating a little sweeter, or leave it out for a no-added-sugar version.
- Peanut butter: Drizzle it over the pumpkin coating to create the mummy "wraps." You can substitute another nut or seed butter if needed.
- Mini chocolate chips: Two little chocolate chips make the easiest mummy eyes!
See recipe card for quantities.
How to Make Your Halloween Banana Pops
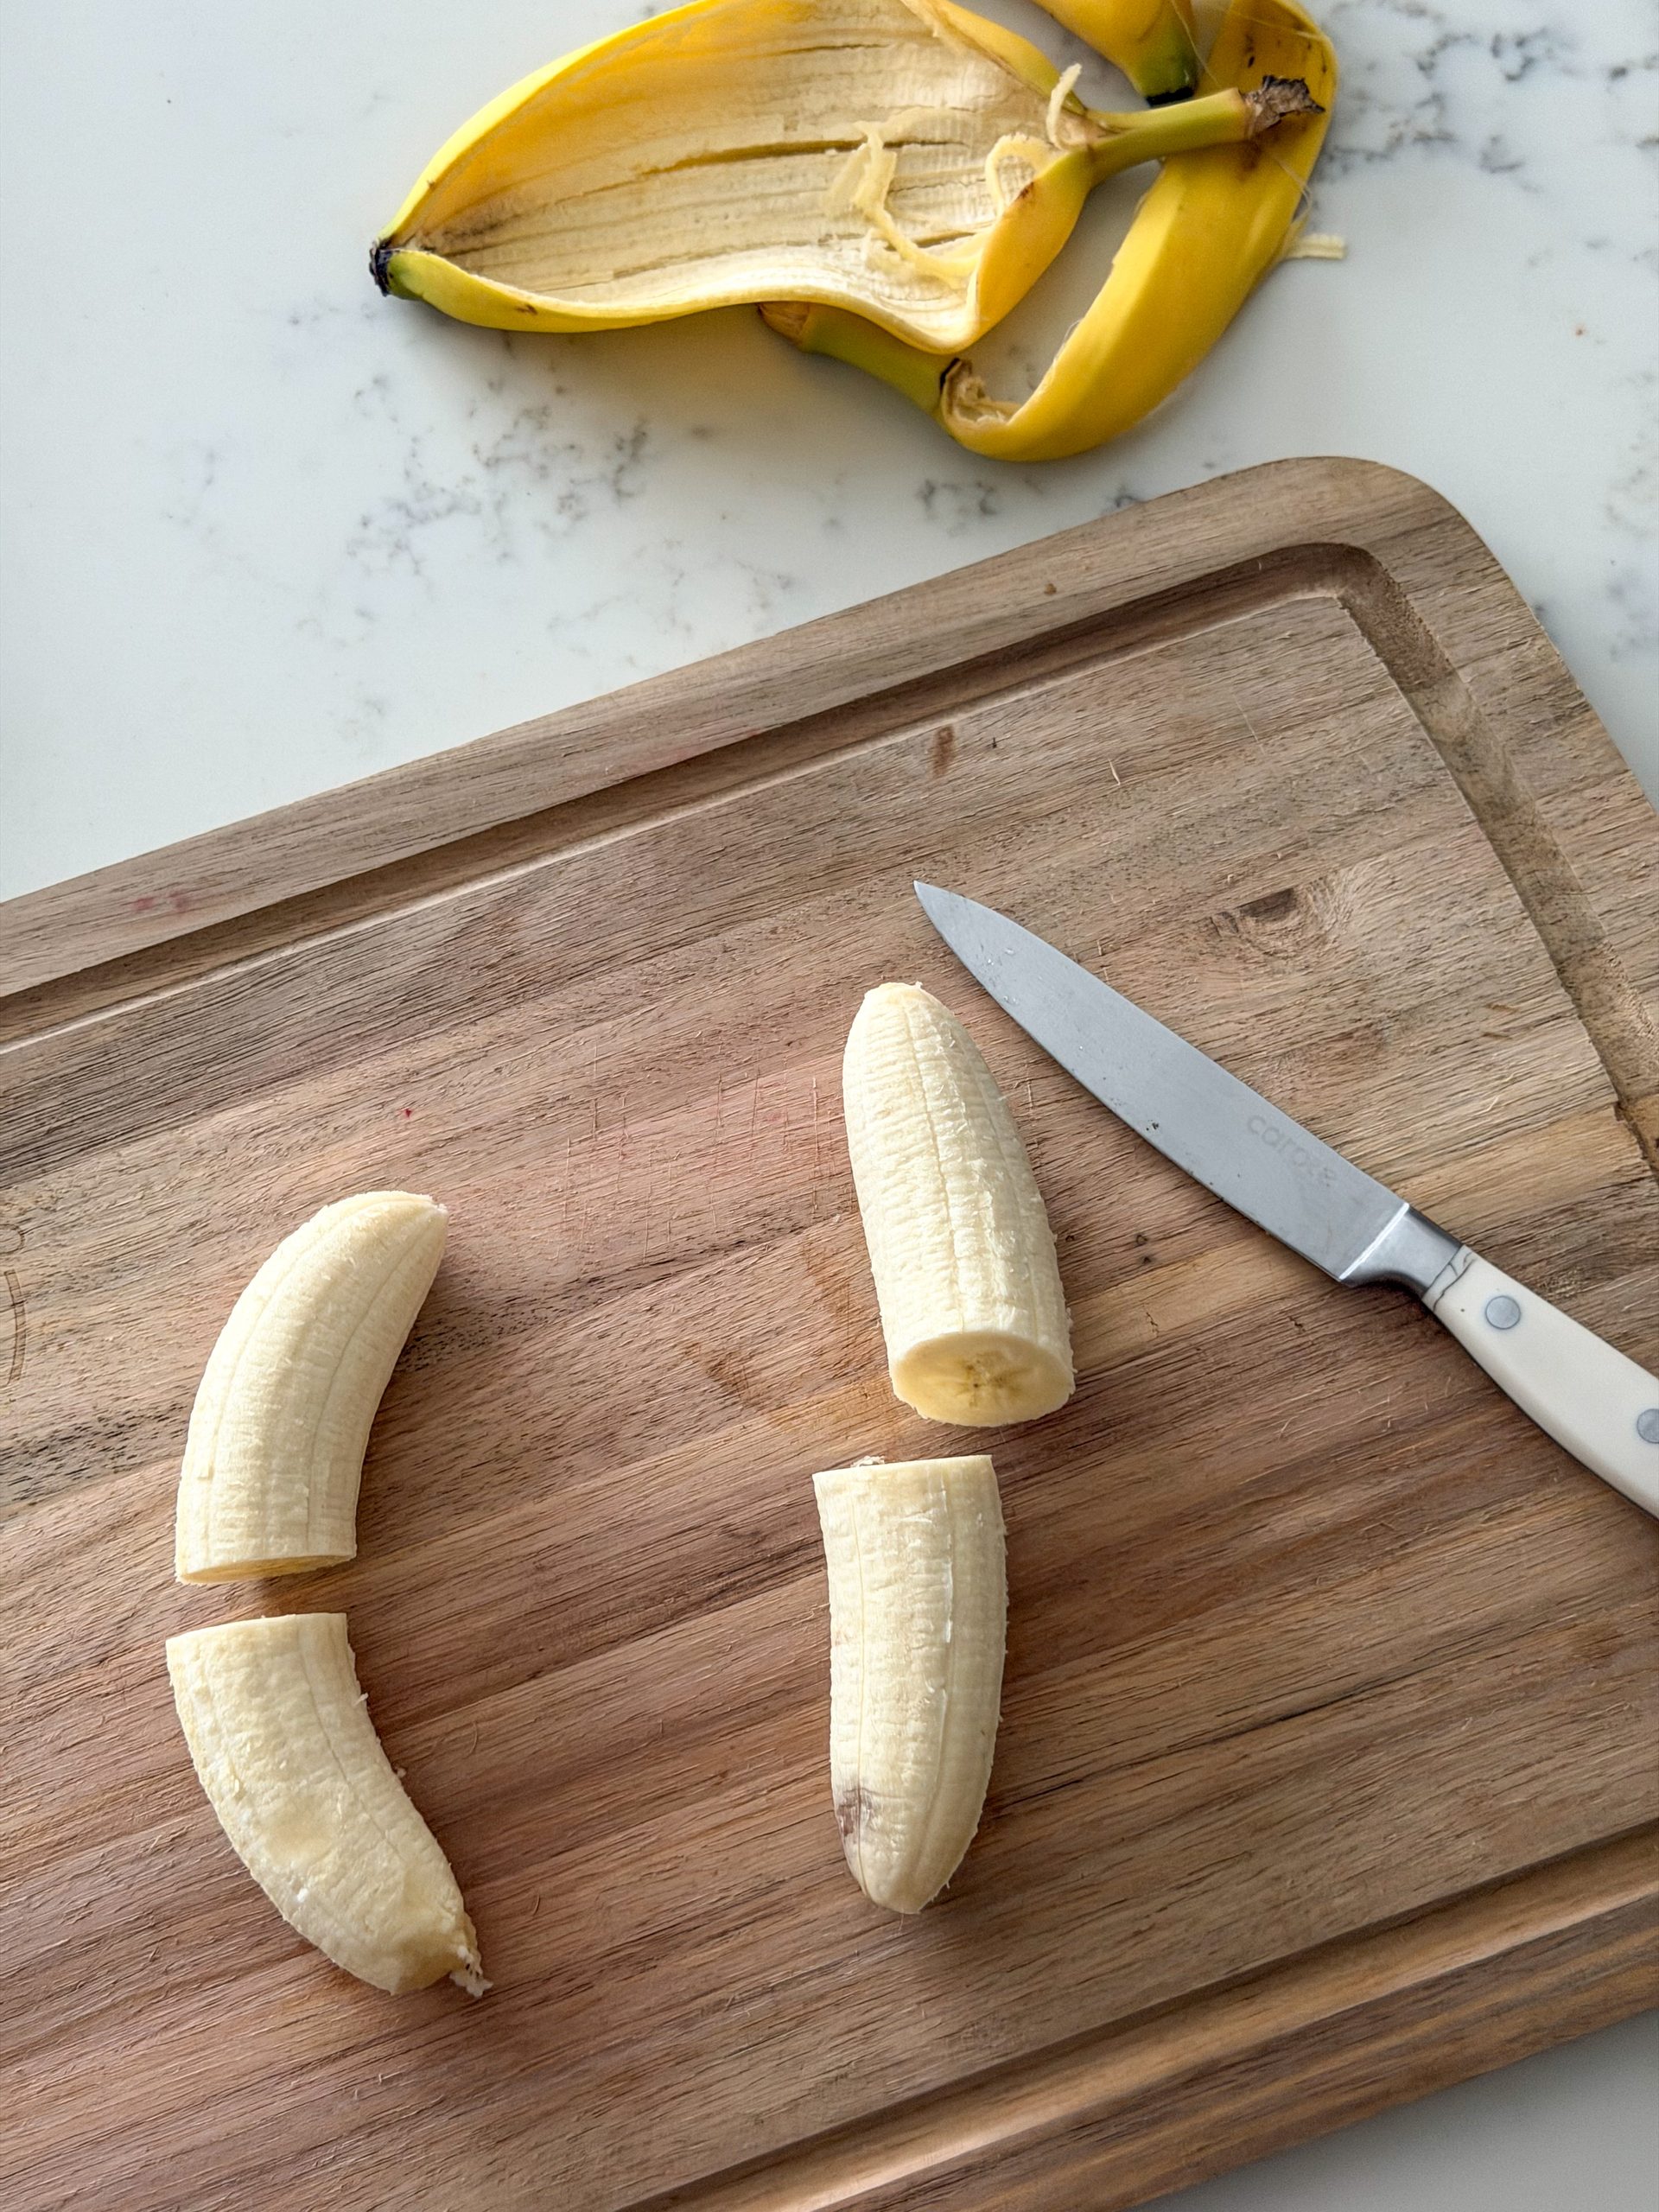
- Step 1: Peel the bananas and cut each one in half crosswise. Carefully insert a popsicle stick into the cut end of each banana half. Place the bananas on a parchment-lined baking sheet or plate. For easier dipping, you can freeze the bananas for about 30 minutes first so they're a little firmer.
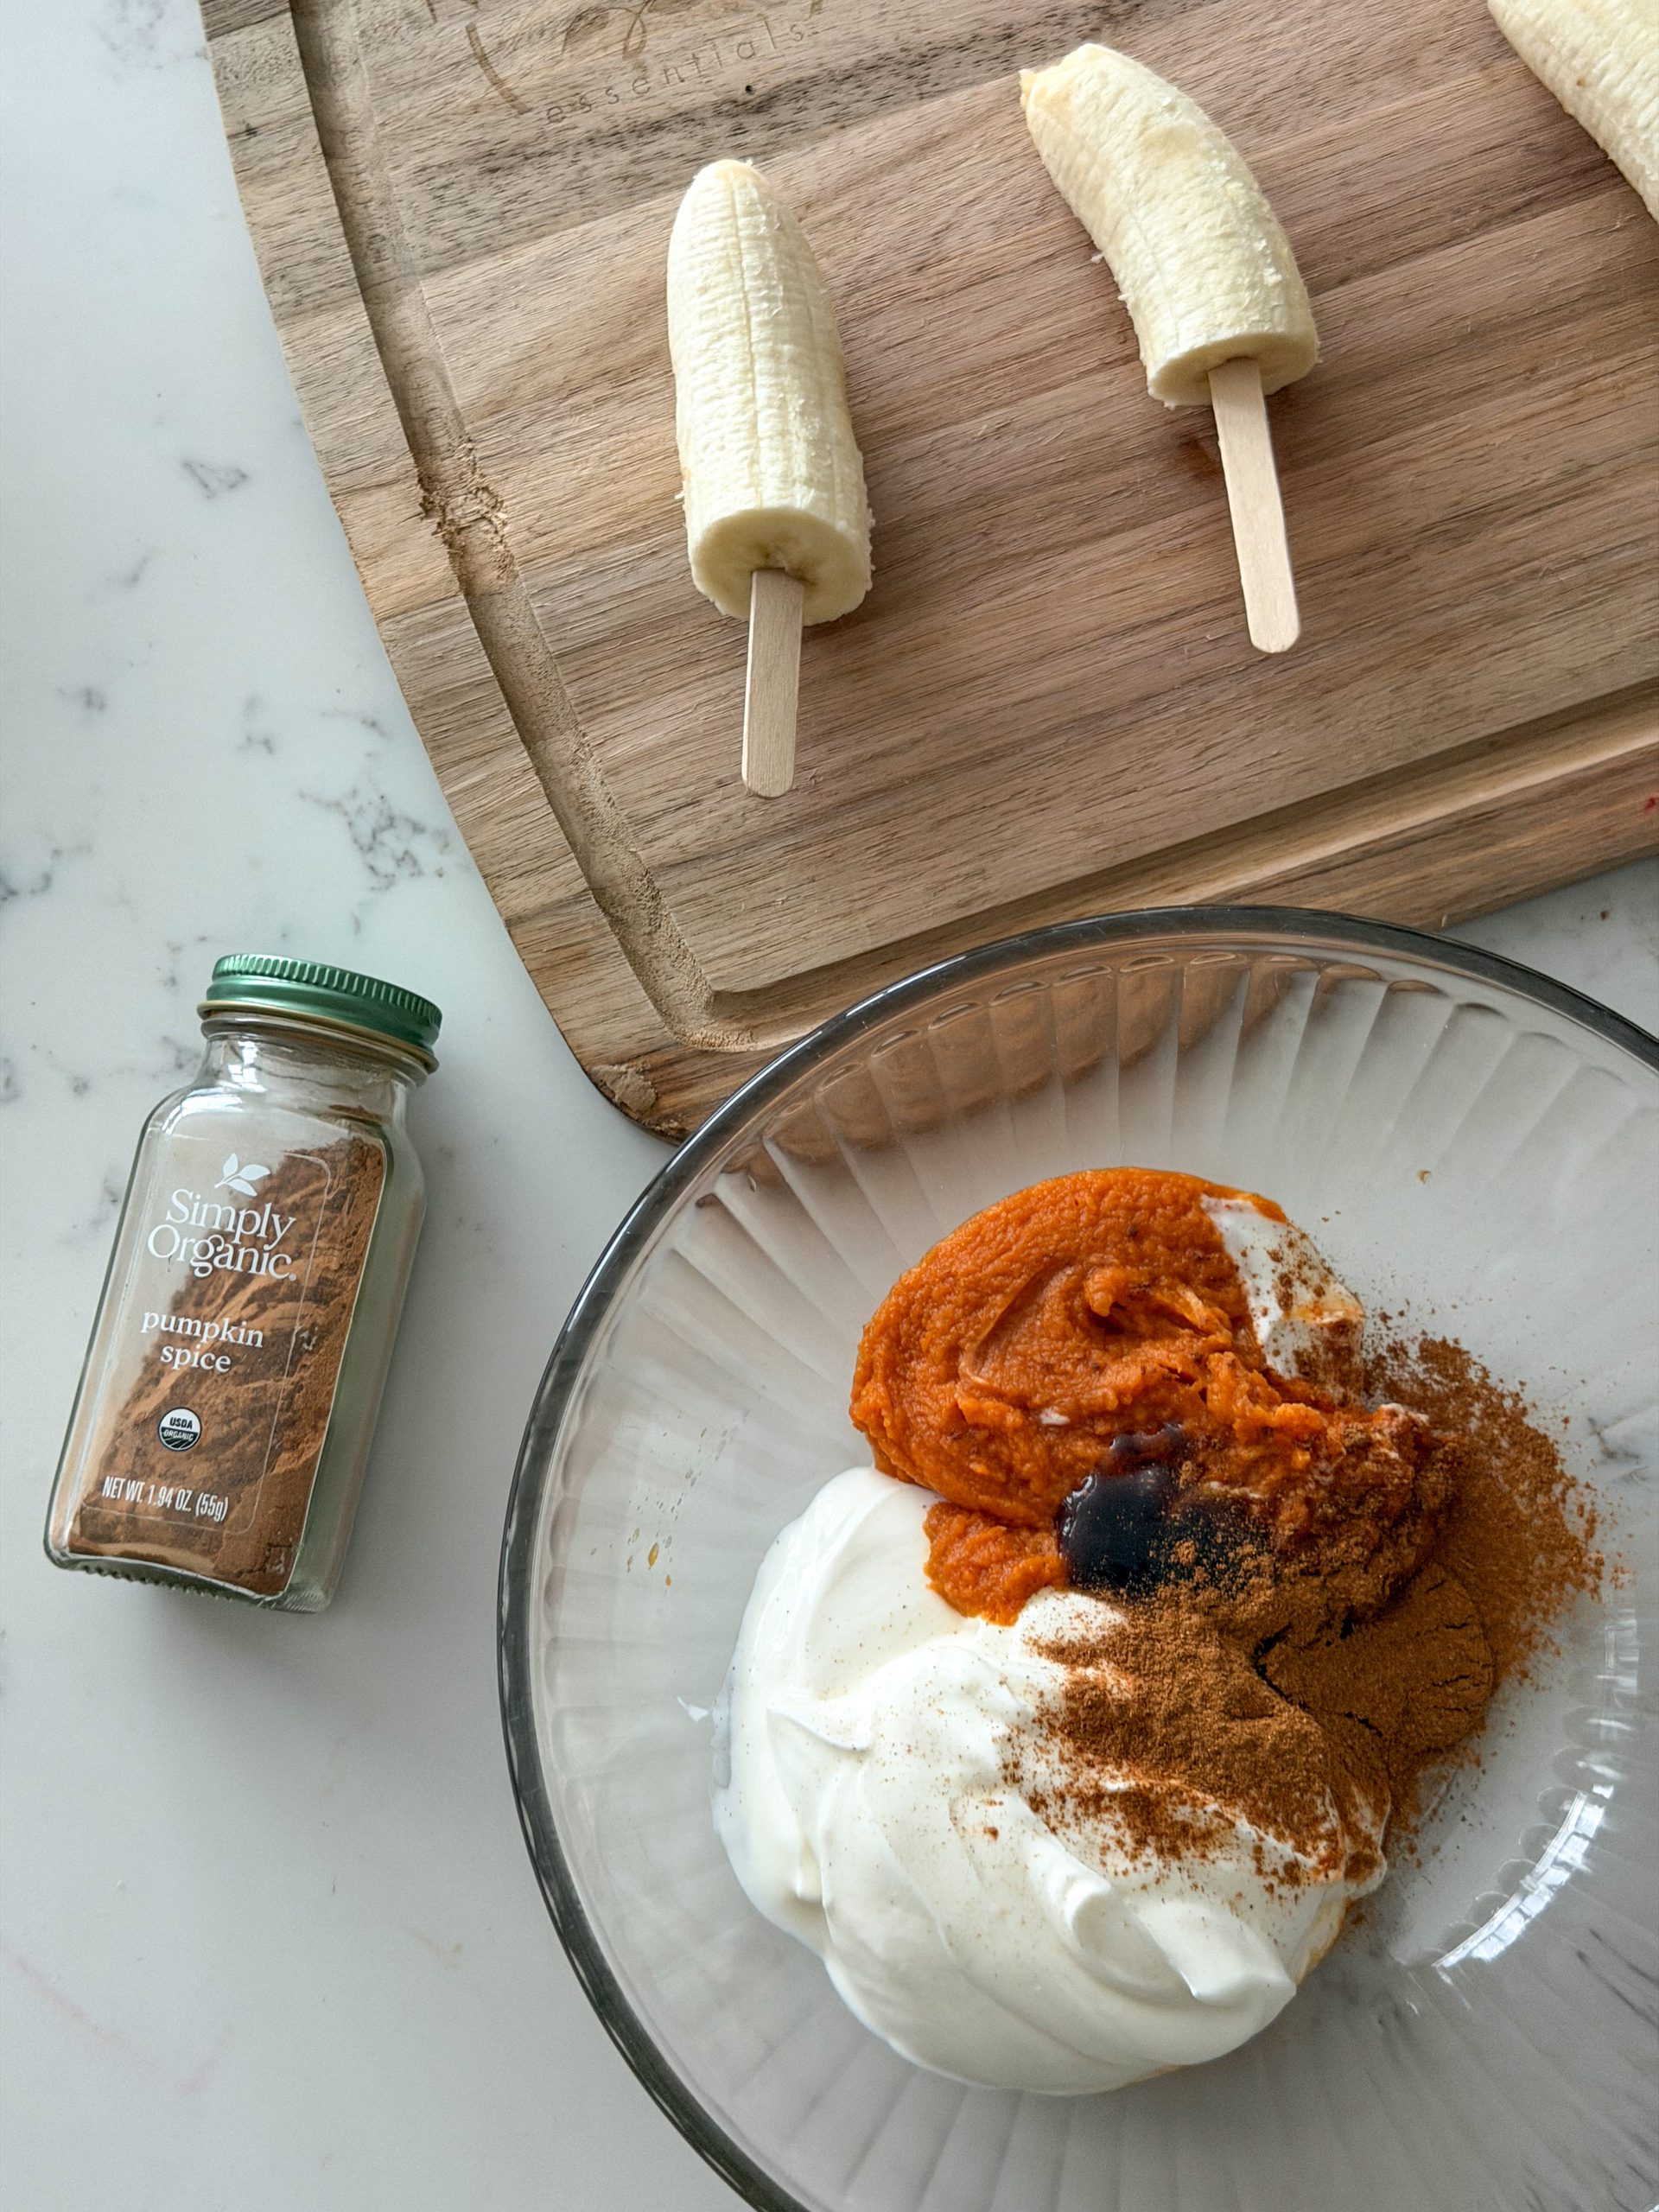
- Step 2: In a bowl, stir together the Greek yogurt, pumpkin purée, vanilla, pumpkin pie spice or cinnamon, and maple syrup if using. You want the mixture thick enough to coat the bananas without immediately sliding off.
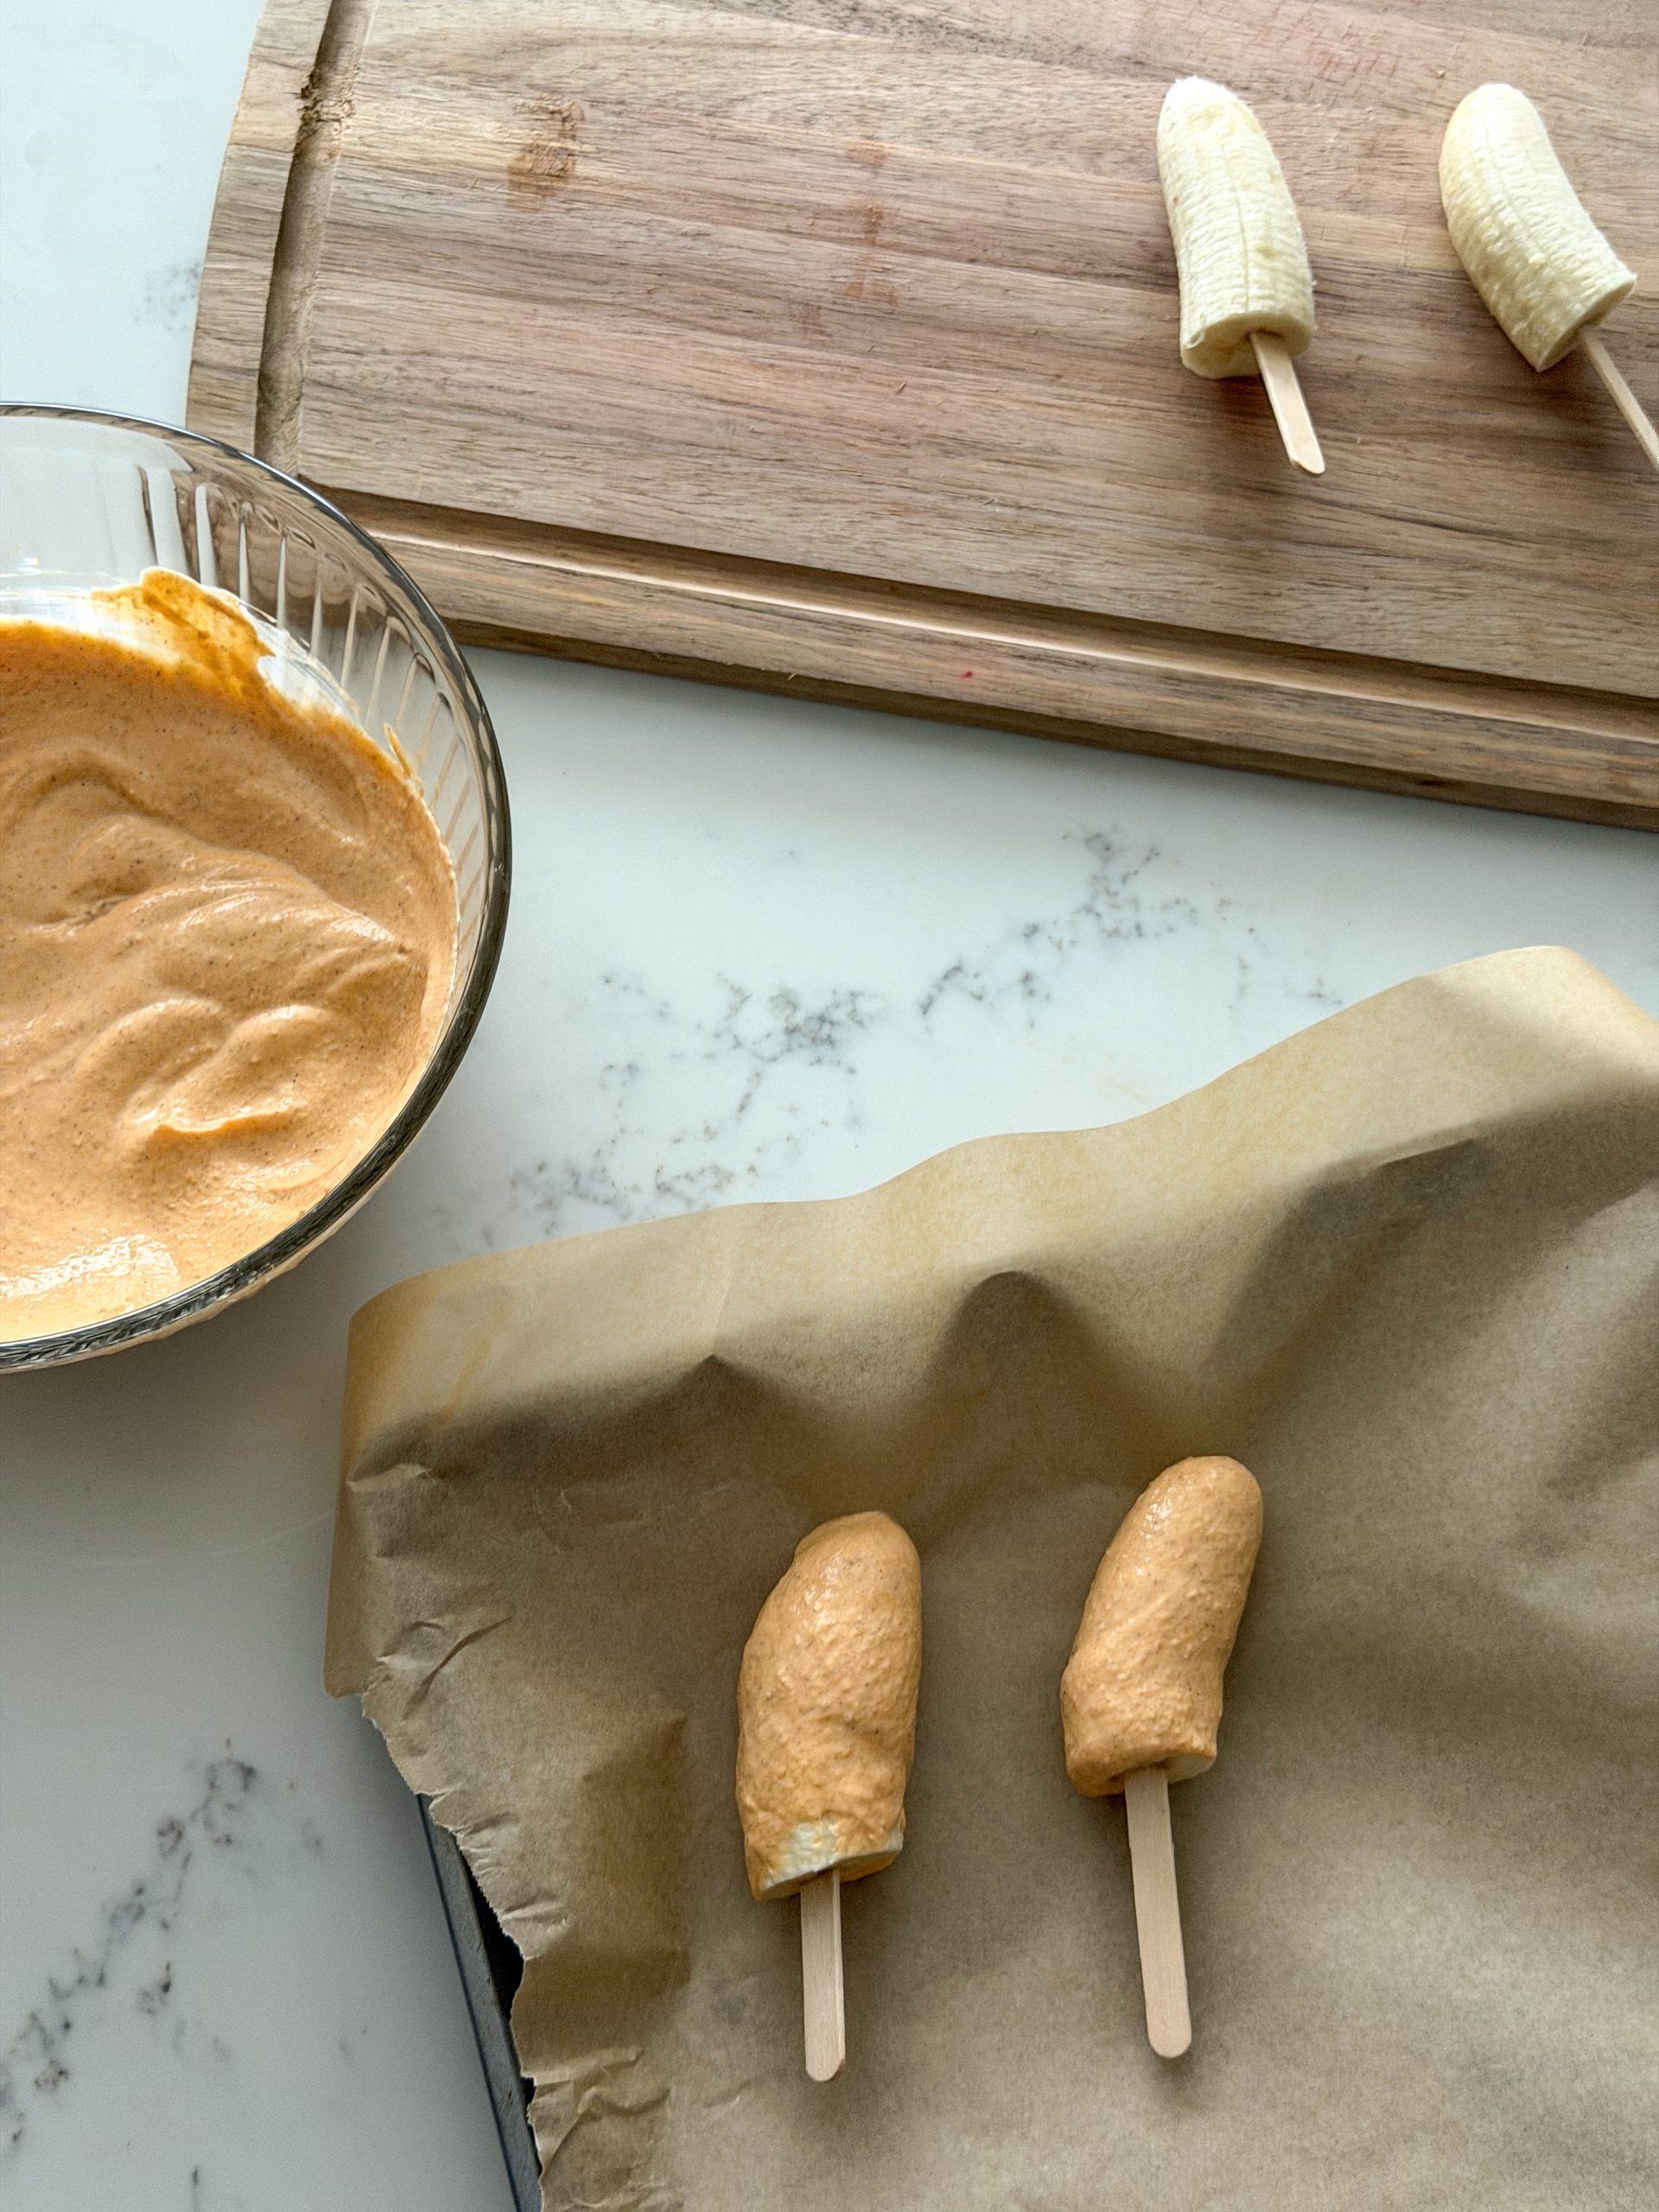
- Step 3: Dip each banana into the pumpkin yogurt mixture, using a spoon to help coat the entire banana if needed. Allow any excess yogurt to drip off, then return the banana to your parchment-lined pan.
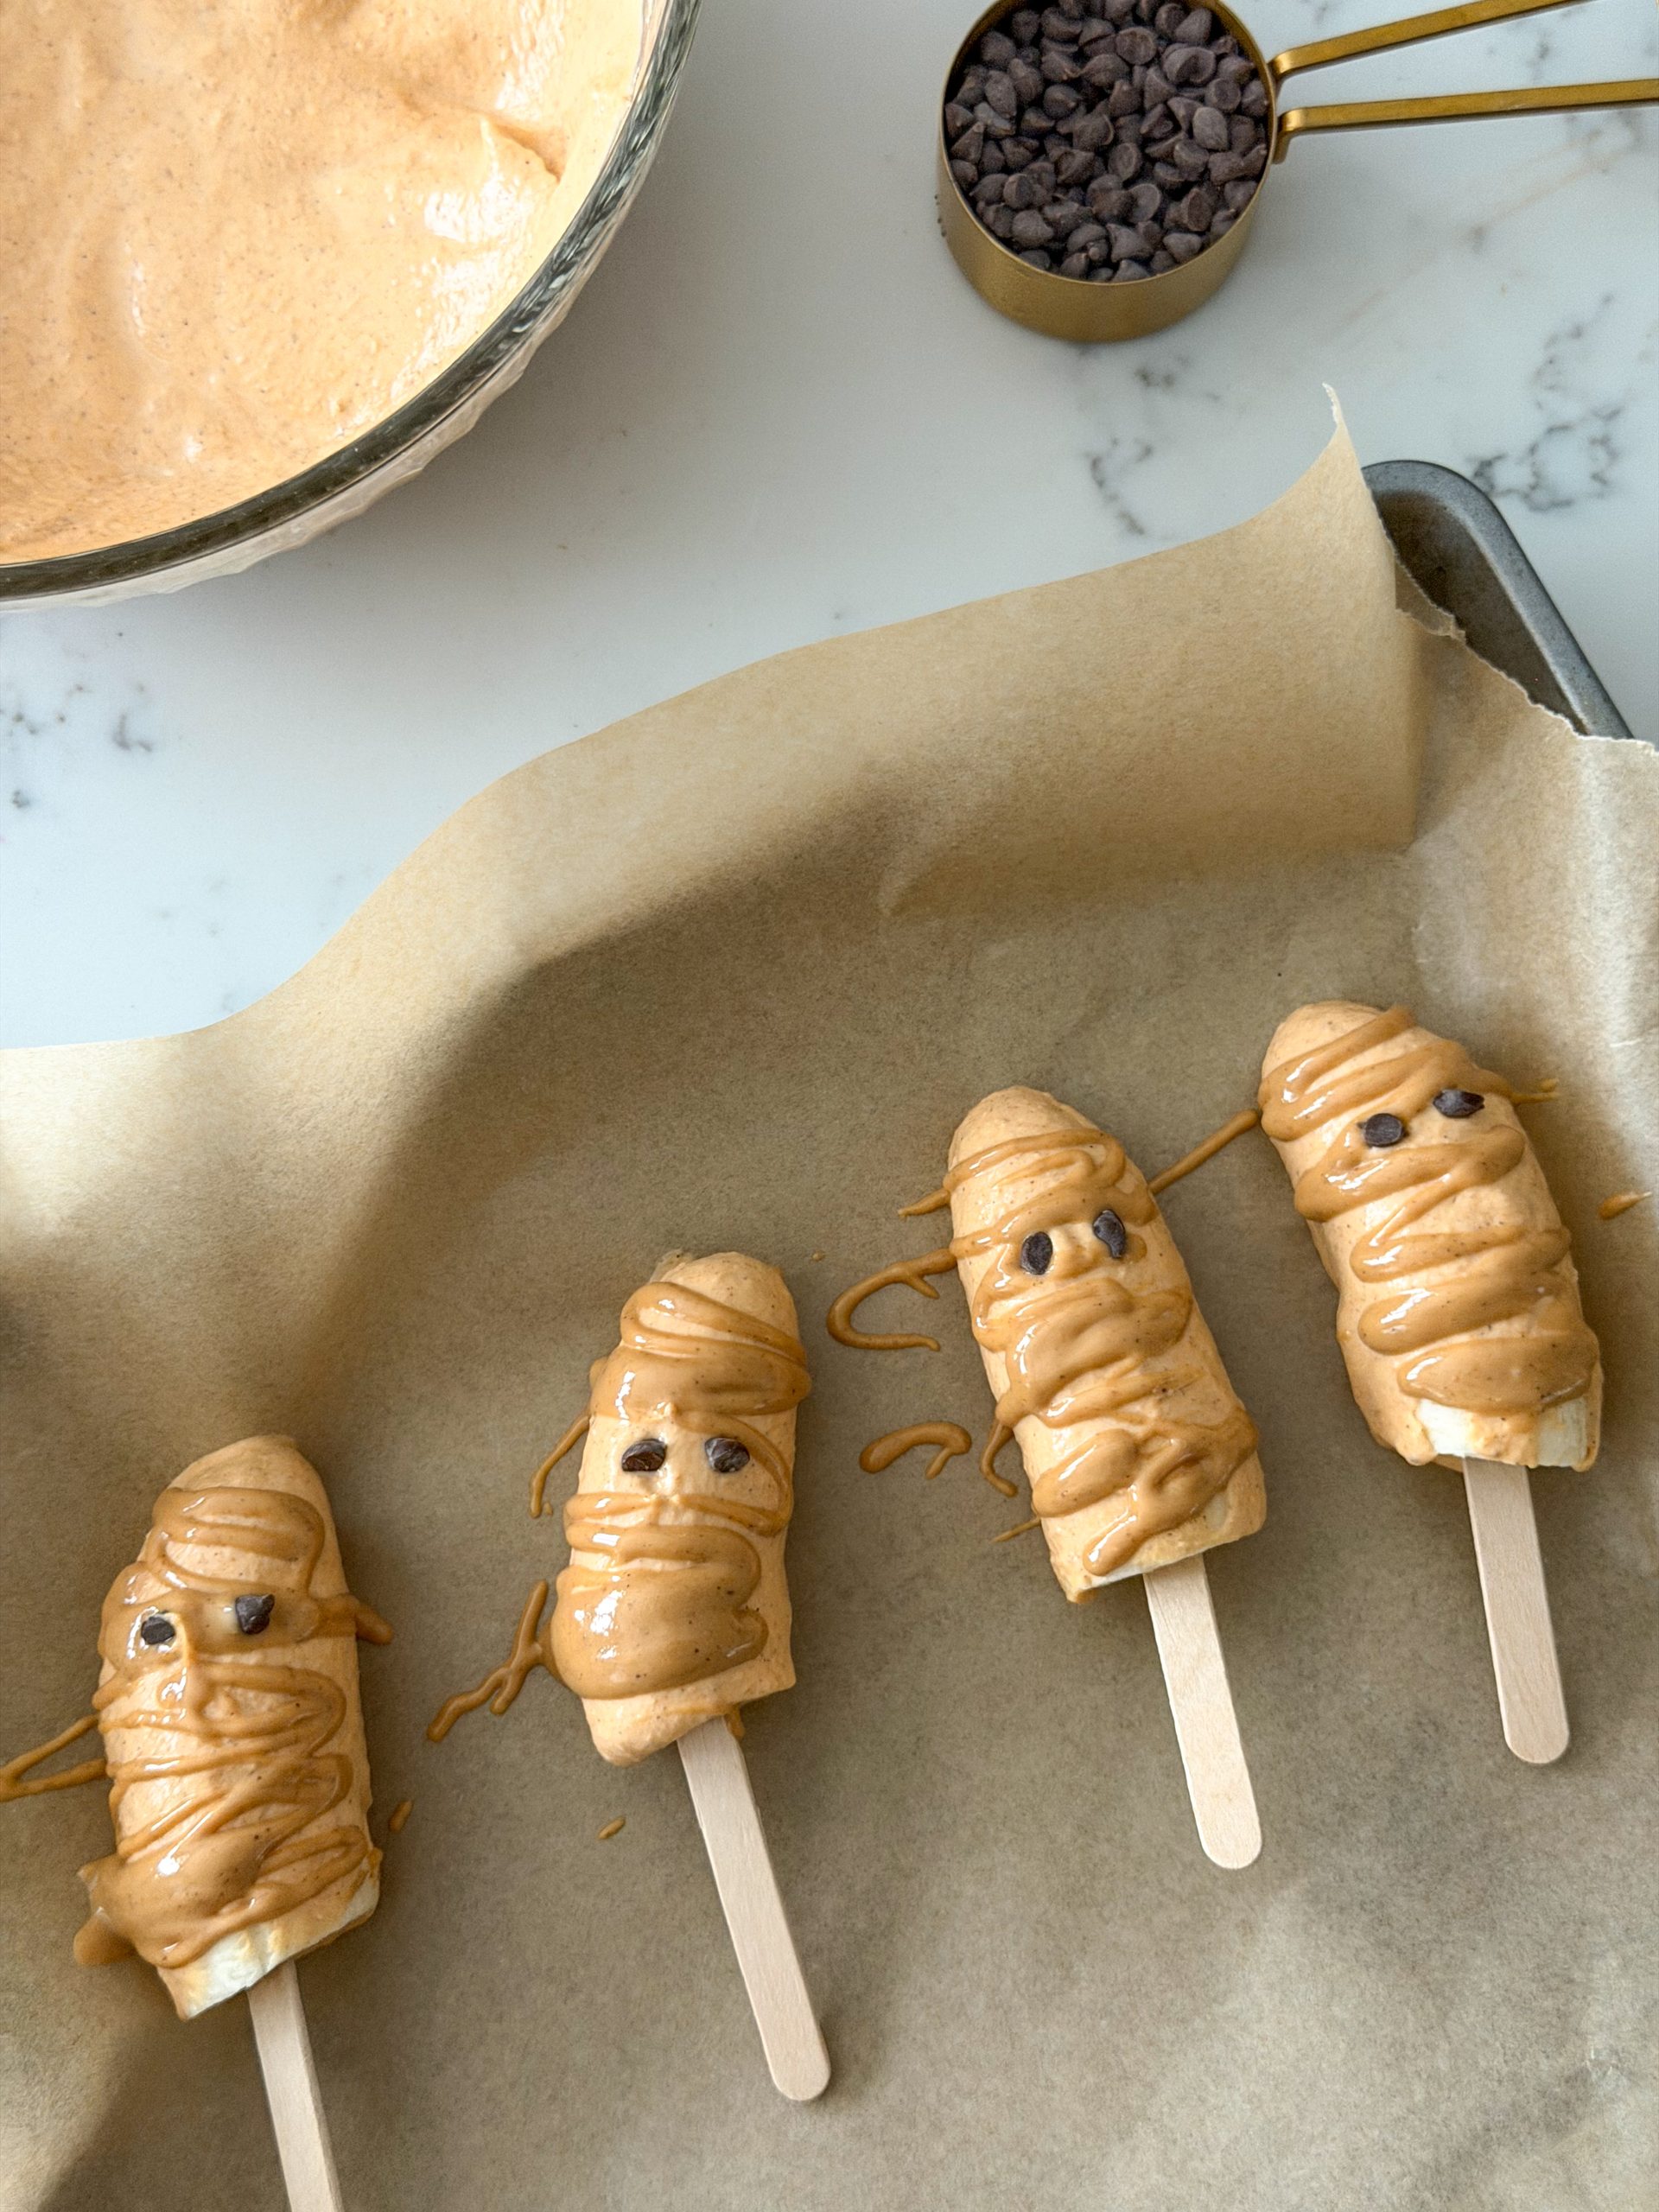
- Step 4: Add two mini chocolate chips toward the top of each banana for the eyes. Warm your peanut butter slightly so it's easy to drizzle. Drizzle thin lines of peanut butter back and forth across each banana to create the mummy "wraps." Don't worry about making them perfect, the messier lines actually make them look more mummy-like!
- Place the banana pops in the freezer until the yogurt coating is firm. Enjoy straight from the freezer, or let them sit at room temperature for a few minutes before serving for a slightly softer texture.
Tips for the Best Banana Yogurt Pops
Use thicker Greek yogurt. A thick yogurt will stick to the banana much better than a thin regular yogurt.
Don't use overly ripe bananas. You want them sweet but still firm enough to stay securely on the popsicle stick.
Freeze the bananas before dipping. This isn't absolutely necessary, but chilling or partially freezing the bananas first can make them much easier to coat.
Use a tall glass for dipping. Pouring the pumpkin yogurt mixture into a narrow glass can make it easier to completely cover the banana.
Warm the peanut butter. If your peanut butter is thick, then warm for about 10-15 seconds in the microwave can make natural peanut butter much easier to drizzle.
Substitutions
These Halloween banana pops are already gluten-free and so easy to customize!
- Dairy-free: Swap the Greek yogurt for a thick, unsweetened dairy-free yogurt, such as coconut or oat-based yogurt.
- Peanut-free: Replace the peanut butter drizzle with sunflower seed butter, tahini, or another tolerated nut/seed butter.
- Nut-free: Use sunflower seed butter or tahini for the mummy drizzle. Be sure to check the labels on your yogurt and chocolate chips if avoiding cross-contact.
- Chocolate-free: Skip the chocolate chip eyes and use small pieces of soft fruit instead, or simply leave the eyes off.
Other Ways to Decorate Your Halloween Banana Pops
You don't HAVE to turn these banana yogurt pops into mummies! Try making:
- pumpkin banana pops: skip the peanut butter drizzle and keep the orange pumpkin-yogurt coating
- banana ghosts: use plain Greek yogurt instead of pumpkin and add chocolate chip eyes
- monster banana pops: add silly chocolate chip faces
- Halloween sprinkles: let your little ones decorate their own
- chocolate drizzle: drizzle with melted chocolate instead of peanut butter
Why Add Pumpkin?
Pumpkin isn't just for muffins and pumpkin bread! Adding pumpkin purée to Greek yogurt gives these banana pops their fun orange color and fall flavor while also providing nutrients like beta-carotene, which our bodies can convert into vitamin A.
It's also an easy way to use up that little bit of pumpkin that's ALWAYS left in the can after making a fall recipe.
Equipment
You’ll need a small mixing bowl, spoon or whisk for mixing the pumpkin yogurt coating, popsicle sticks, a parchment-lined baking sheet or plate, and a spoon for dipping and coating the bananas. A small microwave-safe bowl is also helpful for warming the peanut butter so it’s easier to drizzle over the mummy banana pops.
How to Store Halloween Banana Pops
Keep the finished banana pops in an airtight freezer-safe container for up to a week for the best texture. Once completely frozen, you can place parchment paper between layers to keep them from sticking together.
Before serving to younger kids, allow the pops to soften slightly so the banana isn't rock-hard straight from the freezer.
Dietitian Tiff's Tip
Fun food doesn't have to mean making elaborate snacks every day.
Sometimes it's as simple as putting a familiar food on a stick, adding a dip, cutting it into a different shape, or giving it a silly seasonal name. And yes, chocolate chips can absolutely be part of the fun!
Giving kids opportunities to interact with food in playful, low-pressure ways can help make eating feel more enjoyable without putting pressure on them to actually eat it.
FAQ
Yes! These are perfect for making ahead. Store the finished banana pops in an airtight freezer-safe container and let them soften for a few minutes before serving.
No, but chilling or partially freezing the bananas for about 20-30 minutes helps firm them up and makes them easier to coat with the pumpkin yogurt mixture.
You can, but Greek yogurt works best because it's thicker and sticks to the bananas more easily. If using regular yogurt, the coating may be thinner and more likely to drip off.
Make sure your yogurt mixture is nice and thick and your bananas aren't overly ripe. Partially freezing the bananas before dipping can also help the coating stick. If your pumpkin yogurt mixture seems too thin, add a little more Greek yogurt.
Yes! Use a thick dairy-free yogurt in place of the Greek yogurt. Coconut-based yogurt tends to be especially thick and creamy.
Related
Looking for other recipes like this? Try these:
Pairing
These are my favorite dishes to serve with these Halloween banana pops:
Healthy Halloween Banana Pops
Ingredients
- 3 medium bananas
- ¾ cup plain or vanilla Greek yogurt can sub dairy-free yogurt
- ¼ cup pumpkin purée
- 1 teaspoon vanilla bean paste or vanilla extract
- ½ teaspoon pumpkin pie spice or cinnamon
- 1-2 teaspoon maple syrup or honey optional for sweetness
- 2 tablespoon creamy peanut butter for drizzling
- 12 mini chocolate chips for the mummy eyes

Instructions
- Peel the bananas and cut each one in half crosswise. Carefully insert a popsicle stick into the cut end of each banana half.
- Place the bananas on a parchment-lined baking sheet or plate and freeze for about 20-30 minutes to firm up. This makes them easier to coat.
- In a small bowl, mix together the Greek yogurt, pumpkin purée, vanilla, pumpkin pie spice or cinnamon, and maple syrup (if using).
- Dip each banana into the pumpkin yogurt mixture, using a spoon to help evenly coat the outside. Allow any excess coating to drip off, then return to the parchment-lined pan.
- Add two mini chocolate chips to each banana for the eyes. Slightly warm the peanut butter until thin enough to drizzle, then drizzle it back and forth over each banana to create the mummy "wraps."
- Freeze for about 1 hour, or until the yogurt coating is firm. Let the banana pops soften slightly before serving, especially for younger children.
Emilyr says
My kids love popsicles and these were a healthy alternative for them! Loved this idea
toddlerdietitiantiff says
Woohoo!!! So glad they loved them and that they were hopefully easy for you to make!